How to Make Sauna Whisks: A Step-by-Step Guide
Share
If you’ve ever wondered how to make a sauna whisk, the process is more accessible than it seems. You can make a functional wellness tool out of natural branches and herbs with the correct materials and expertise.
A sauna whisk (also known as a bath broom or venik) is traditionally composed of leafy branches such as birch or oak. It’s used in the steam room to stimulate the skin, improve circulation, and help the body release tension. Making your own gives you control over plant selection and freshness, and it lets you tailor the tool to your needs.
This guide will walk you through how to make sauna whisks from start to finish, explore the tools and materials needed, and explain the key sauna whisk benefits you can expect when using something handmade.
Why Make Your Own Sauna Whisk
Making a whisk yourself gives more than just a sense of accomplishment. You choose the materials, control their freshness, and adjust the composition to your needs. Whether for relaxation, recovery, or simply tradition, homemade whisks offer flexibility and quality that mass-produced options can’t match.
One of the most ignored sauna whisk benefits is the practice of prepping the equipment itself. The act of gathering, assembling, and using the whisk connects you to the process — not just the result. For many, that hands-on involvement deepens the experience of the whisk sauna routine. If you make sauna whisks at home, you may experiment with different plant combinations, modify the size, and even create seasonal variants based on what grows nearby. It’s both personal and practical.
Customizing Your Whisk with Herbs and Branches
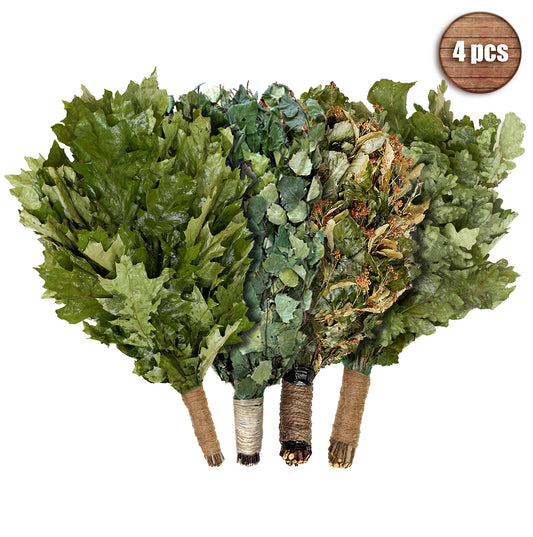
The most common materials for sauna whisks are birch, oak, and eucalyptus. Each has its own feel and scent. Birch is soft and promotes skin cleansing. Oak is denser, offering firmer contact and a grounding aroma. Eucalyptus brings strong fragrance and supports respiratory comfort.
But the options don’t stop there. You can add layers of herbs like mint, thyme, chamomile, or linden for extra sensory and therapeutic effect. Some combinations calm the nervous system, while others target inflammation or improve breathing.
The charm of a handcrafted whisk sauna instrument lies in the variety. You’re not limited to one texture or purpose. When you make sauna whisks yourself, you can match the content to your physical needs or mood — something factory-made products rarely allow.
Sustainable and Natural Approach
Handcrafting your own sauna whisk also supports sustainability. Instead of relying on imported or plastic-wrapped goods, you’re using what’s available in your environment. This minimizes waste and transportation impact.
Making sauna whisks does not involve any machinery or synthetic materials. It’s simple: harvest responsibly, dry properly, tie by hand. If done with care, even the leftover trimmings can be composted or used in herbal infusions.
Using local branches and herbs reduces chemical exposure too. Just plant materials and water, no preservatives or artificial smell. It’s an old method, but it works. And it fits perfectly into modern eco-conscious thinking.
What You’ll Need to Make Sauna Whisks
Before starting the process, gather all required items in one place. Making sauna whisks doesn’t require special tools, but having the right materials will save time and ensure better results. To begin, you’ll need:
-
A bundle of flexible branches (fresh or semi-dried);
-
Sharp scissors or garden shears;
-
Natural twine or string for tying;
-
A large container of warm water for soaking;
-
Clean cloth or paper to wrap and store the finished whisk.
Once you’ve set these aside, you’re ready to make sauna whisks that are durable and tailored to your preferences. This list is based on traditional methods used by those who’ve passed down the skill for generations. If you're still wondering how to make sauna whisk tools at home, the sections following will show how to select the best materials and prepare them for construction.
Choosing the Right Branches and Herbs
Your sauna whisk feel, scent, and performance are all affected by the branches you choose. Fresh branches are easiest to work with, but semi-dried ones can also be used if soaked in warm water before tying.
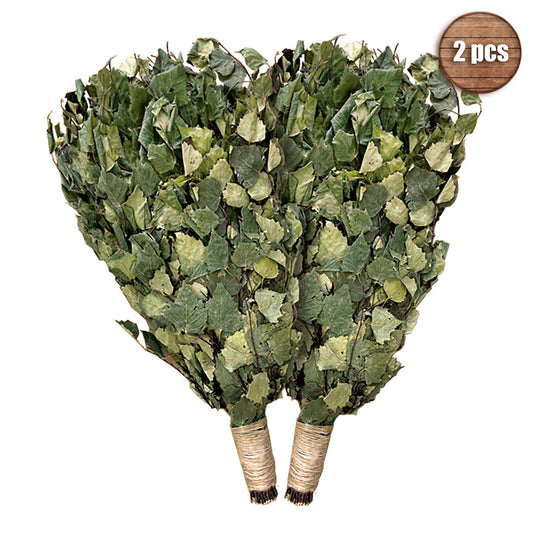
If you’re learning how to make a sauna whisk, start with birch. It’s flexible, widely available, and works well for most users. Oak branches are thicker and stronger — better for a firmer whisk. Eucalyptus is fragrant and great for respiratory relief, but harder to source locally in some regions.
You can also include herbs like nettle, yarrow, or mint. These add aroma and enhance the whisk’s effect on the skin. Just be sure the herbs are clean and pesticide-free.
Preparing the Materials for Assembly
Proper prep is key in making sauna whisks that last more than one or two sessions. After harvesting, rinse all branches to remove dirt and insects. Trim off damaged leaves or sharp edges.
If your branches are too dry, soak them in warm water for 10–20 minutes to restore flexibility. This step is important when learning how to make sauna whisk tools that are both soft and durable.
Let the branches air-dry slightly after soaking. They should be pliable but not dripping wet when you begin assembling. Keep herbs separate until the last minute — they tend to lose scent quickly when exposed to heat or water too long. Once prepped, lay everything out in one place. A flat work surface and some space to move will help you build a tight, balanced whisk.
How to Make a Sauna Whisk: Step-by-Step
Now that the materials are ready, it’s time to learn how to make a sauna whisk from start to finish. The process is simple but requires attention to balance and structure. A well-made whisk should feel even in the hand, hold its shape, and deliver consistent pressure during use.
To make sauna whisks that are functional and long-lasting, follow the steps below. Traditional methods rely on hand-tying and natural shape, requiring only string, scissors, and your hands. Once built, the sauna whisk can be used immediately or dried for later use.
Assembling the Whisk
Start by selecting a group of straight, flexible branches for the core. These form the center of the whisk and give it structure. Around this core, layer more branches in a circular pattern, arranging leafy ends outward. Rotate the bundle as you go to keep the shape even.
If you’re learning how to make sauna whisk tools for the first time, don’t rush this step. Take time to adjust thickness and length. Aim for a head that’s full but not too dense — it should move with air and steam, not feel like a heavy club.
Once the shape is set, grip the bundle tightly at the base of the leaves — this will become the start of the handle. Wrap twine or natural rope several times around this point and pull it tight. Secure with a knot. Then, to make the grip stronger and stop the branches from shifting, wrap the handle down.
Trim the ends to make the handle smooth and uniform. At this point, the basic structure is complete and ready for use or drying. This approach matches traditional sauna whisking styles: compact, balanced, and designed to respond well in heat and humidity.
Drying and Storing the Finished Product
Fresh whisks can be used immediately, but most people prefer to dry them for later use. To preserve shape and aroma, hang the whisk upside down in a shaded, ventilated space. Avoid direct sun — it breaks down essential oils and makes the leaves brittle.
Drying usually takes 1 to 2 weeks, depending on humidity and branch thickness. Once dry, store sauna whisks in breathable fabric or paper, not plastic. This prevents mold growth and ensures consistent moisture levels.
If you’re making sauna whisks in batches, identify them with the date and materials used. Some will have stronger scents or textures based on the herbs and branches selected.
A dried whisk sauna tool can last through several sessions if cared for. Always soak before each use, and dry it again after. With minimal effort, a handmade whisk becomes a reusable, natural part of your sauna practice.
Using and Caring for Your Sauna Whisks
Even a well-made sauna whisk won’t last long without proper use and maintenance. Knowing how to prepare it for each session and how to treat it afterward helps extend its lifespan and preserve its benefits.
The care process isn’t complicated, but it does require a bit of attention. Well-handled whisks hold their structure, keep their aroma, and stay effective longer — so you get full sauna whisk benefits every time. Below are tips for both first-time use and ongoing care that match traditional whisk sauna practices.
Tips for First Use
Before the first use, soak the sauna whisk in warm water (not boiling) for 10–20 minutes. If it’s very dry, extend the time or wrap it in a damp towel.
Shake off excess water and let it rest for a minute. In the sauna, warm it up in the air before touching the skin. Gentle movements are enough — steam does most of the work. That’s the core of effective how to make sauna whisk use.
Storage and Reuse Recommendations
Rinse after each use, shake dry, and hang in a ventilated area. Avoid sealed containers — moisture will damage the whisk. For short-term storage, it can stay slightly damp. For longer periods, dry fully and wrap in cloth or paper. Most sauna whisks can handle 3–5 uses with basic care. Rotate if you’re making sauna whisks in batches.
Conclusion
Now you know how to make a sauna whisk and use it for relaxation and well-being. This simple tool — made with natural materials and a bit of effort — offers real value in both wellness and tradition.
A well-crafted sauna whisk stimulates circulation, supports detox, and enhances the whole sauna experience. When made and handled with care, it becomes part of a long-standing ritual that connects body and mind through heat, rhythm, and scent.
Among the lasting sauna whisk benefits is the knowledge that you're using something you made yourself. That connection, along with the physical effects, is what gives sauna whisks their place in modern and traditional sauna practices alike.